


|
HOME STUDIO For Voice Over Non-Nerds (OK, Nerds, Too): Tech Terms To Understand About Audio Recording  By James Romick By James RomickVoice Actor, Voice Over & Audiobook Recording Instructor In the
process of doing research for this article, I came across a website that lists
(alphabetically) all of the terms and nomenclature pertaining to audio
recording you'd ever want (or care) to know, all cross referenced with links to
links with their own links to all possible synonyms and associated slang terms
and on and on and on. You can (as I did) spend hours and hours clicking your
way down the rabbit hole of audio recording terms and terminology until that
pork chop you had frying on the stove starts to burn, setting off the smoke alarm,
causing your dogs (I have three) to go into the barking jag of their lives,
finally snapping you out of your trance.
Here's the
link. Have fun, but don't leave anything on the stove before you click on it: https://lossenderosstudio.com/glossary.php?index=a
"So," I
thought to myself, "what things should I mention that your average non-nerd (or
nerdy) voice artist should know so as not to be embarrassed, without dumbing
the article down and/or appear to be condescending?"
Well, here
are some basics.
ANALOG VS. DIGITAL  When studios
recorded on magnetic tape (which still happens, by the way), that was an Analog
Recording. When studios
recorded on magnetic tape (which still happens, by the way), that was an Analog
Recording. Sound waves from your voice hit the microphone, were converted into
electric impulses that were sent through a series of wires to the record head
of the tape machine where the metallic bits embedded in the magnetic tape were
aligned in such a way that could be nearly
identically be replicated upon playback. Editing consisted of cutting that tape
on an angle with a razor blade when placed in a "splicing block" and then placing
a thin, industrial strength piece of sticky tape on the underside.
Fast forward to today.  Digital
Recording slices up that Analog signal via an A/D (Analog to Digital) converter
(via a preamp/interface connected to the microphone and to the computer) into
the 1's and 0's that your DAW (Digital Audio Workstation – the software) and
computer understands. Digital
Recording slices up that Analog signal via an A/D (Analog to Digital) converter
(via a preamp/interface connected to the microphone and to the computer) into
the 1's and 0's that your DAW (Digital Audio Workstation – the software) and
computer understands. On playback, the process is reversed through a D/A
(Digital to Analog) converter back into something that humans can actually hear
and make sense of. DAWs perform editing in fundamentally two different ways,
destructive and non-destructive, which will be covered in a later article. Either way though, digital sound editing is sooooo much easier and more precise
than splicing up and piecing together analog magnetic tape.
PREAMP VS INTERFACE
These two terms are most often used interchangeably now-a-days. But they are
two different things – kinda. A Preamp (or preamplifier) is a piece of hardware
that amplifies (or "boosts") low-level audio signals. An Interface (which has a
built-in preamp) is in the signal chain between the microphone (via an XLR
cable) and the computer. The preamp/interface connects to and draws power from
the computer via a USB connection. And in so doing, provides 48v Phantom Power
to a large diaphragm condenser-type
microphone.
Dynamic Microphones, which are mostly used for live performance and public address
systems and are not recommended strictly for voice over, require a lot of
"gain" but do not draw phantom power from the interface. In fact, phantom power
could very well ruin a dynamic mic. That gain/signal boost may come from
another piece of apparatus. One such name brand is called a Cloudlifter. USB Microphones, which connect directly to the computer via a USB cable, have
the preamp built into it. Thus, there is no need for a separate interface.
POTs, PANs, PADs, PEAKS & PEGGING
A POT (potentiometer)
is a device used to adjust different aspects of the audio signal such as
volume, balance and tone. They are typically either knobs or sliders.
A POT can be
used to PAN left or right.
A PAD can be
a POT, switch or plugin used to attenuate (reduce the loudness) of the incoming
signal to prevent the Peaks (the highest point in the waveform) from Pegging in
to the Red (clipping the signal into distortion).
FX, VSTs, AUs & PLUGINS
 FX ... no, this
is not the cable channel. FX ... no, this
is not the cable channel. FX (or processing effects) are things added to the
recording (usually in the post-production/mastering phase) such as noise
reduction (NR), noise gate (GATE), reverberation (REVERB), equalization (EQ),
compression (COMP), expander (EXP), limiter (LIM), etc. Some of these you will
need and use, others not so much, and a few that you absolutely should not. The
order in which these are placed (which is very important) is called an FX
Chain or Rack.
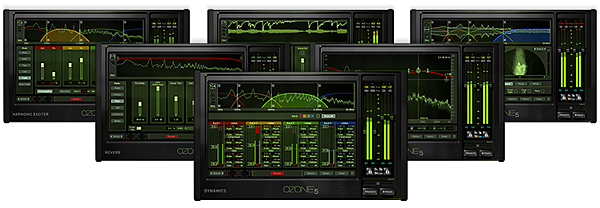
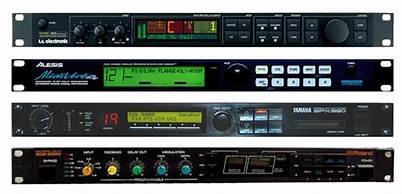 VST (pictured) stands for Virtual Studio Technology. This is the software equivalent of
the physical hardware components you would see in a Rack in a recording studio. VST (pictured) stands for Virtual Studio Technology. This is the software equivalent of
the physical hardware components you would see in a Rack in a recording studio.
AU (Audio
Units) was developed by Apple. These are like VSTs, but can only be used with
DAWs on a Mac that accept their use. Most DAWs do, some do not. And some 3rd
party AUs are also available as VSTs.
And these
are all considered Plugins.
HP, LP, BAND
& NOTCH 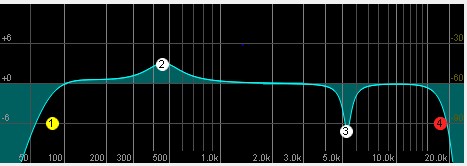 These refer
to EQ. In the diagram: These refer
to EQ. In the diagram: 1. HP = High Pass Filter. 2. BAND = Band. 3. NOTCH = well,
Notch. 4. LP = Low Pass Filter. The pass part is what the filter lets through. For instance: Say
that you set the HP filter at 80Hz (more on that later). Then all of the
frequencies above 80Hz will pass through and be heard. Whereas those
frequencies below 80Hz will be attenuated (dropped in volume), depending upon
the slope (how severe the cut) is applied – usually designated as dB/octave. An
HP filter and a LC (Low Cut) filter are the same thing, also often called a
Roll Off filter. Band Pass filters boost or attenuate a wide or narrow band of
frequencies called the Q – like boosting or softening the bass frequencies on
your stereo or radio. A Notch filter concentrates around a very narrow band of
frequencies centered around a specific frequency and attenuates or boosts them.
Notch filters will often be used as a De-esser to soften sharp sibilant S
sounds.
dB, RMS, LUFS,
VU
These all
refer to loudness. A decibel (dB) or decibel Full Scale (dBFS) is defined as:
What does
that mean? Who knows, really. What is important is that 0.0dBFS is the absolute
maximum voltage (power) that an A/D converter will allow before clipping
(distortion). Most often you see recommendations not to exceed -3.0dB peak for
VO. That spec leaves some "head room" (or "buffer") so you won't even approach
distortion. The logarithmic part means that the levels are exponential rather
than linear. That means that -3dB is not twice as loud as -6dB, but
exponentially louder.
RMS (Root
Mean Square) is measurement of average loudness (louder passages and softer
passages) over time. Audiobooks, for example, attempt to have the average
listening RMS levels of between -18dB and -23dB, so that whispers and shouts can
be heard and understood without having to manually raise or lower the volume.
That could get really tedious!
LUFS
(Loudness Units Full Scale) is similar to RMS and pertains more to the
broadcast industry. The sound specs for podcasts and YouTube videos, for
example, are measured in LUFS.
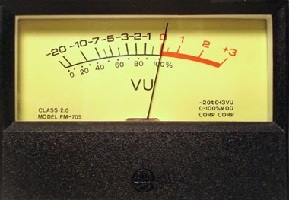 VU (Volume
Unit) is the measure of loudness response of the human ear. The VU Meter was
developed
in the United States in the late 1930s as visual representation of this
measurement. VU (Volume
Unit) is the measure of loudness response of the human ear. The VU Meter was
developed
in the United States in the late 1930s as visual representation of this
measurement.
AMPLITUDE, FREQUENCY, WAVELENGTH Amplitude is
the dynamic range in loudness of sound waves. Huh! There's no fun abbreviation
for this one.
Frequency (Cycles/Second
or Hertz) is the measurement of a wave from peak to peak over time. Broadly
speaking, the higher the number, the higher the "pitch" of the sound. This one
does have a fun abbreviation. Hz. The range of human hearing is between 20Hz to
20KHz. Although as we get older, we lose more and more of that upper range and
we may also qualify for Senior Citizen discounts.
Wavelength
is the distance between wave peaks.
AND MORE ... Bass Traps. These are typically wedges of acoustical foam placed in corners to prevent low
frequency reflections and standing waves.
Pickup Pattern (Polar Pattern). This is how
the microphone's capsule directionally receives the sound. There are many
different types of Pickup Patterns. But the most common one for VO is the
Cardioid (heart shaped) pickup pattern. Frequency Response. This is
a chart or graphic representation showing how a microphone capsule
reacts to the range of frequencies that humans can hear ... 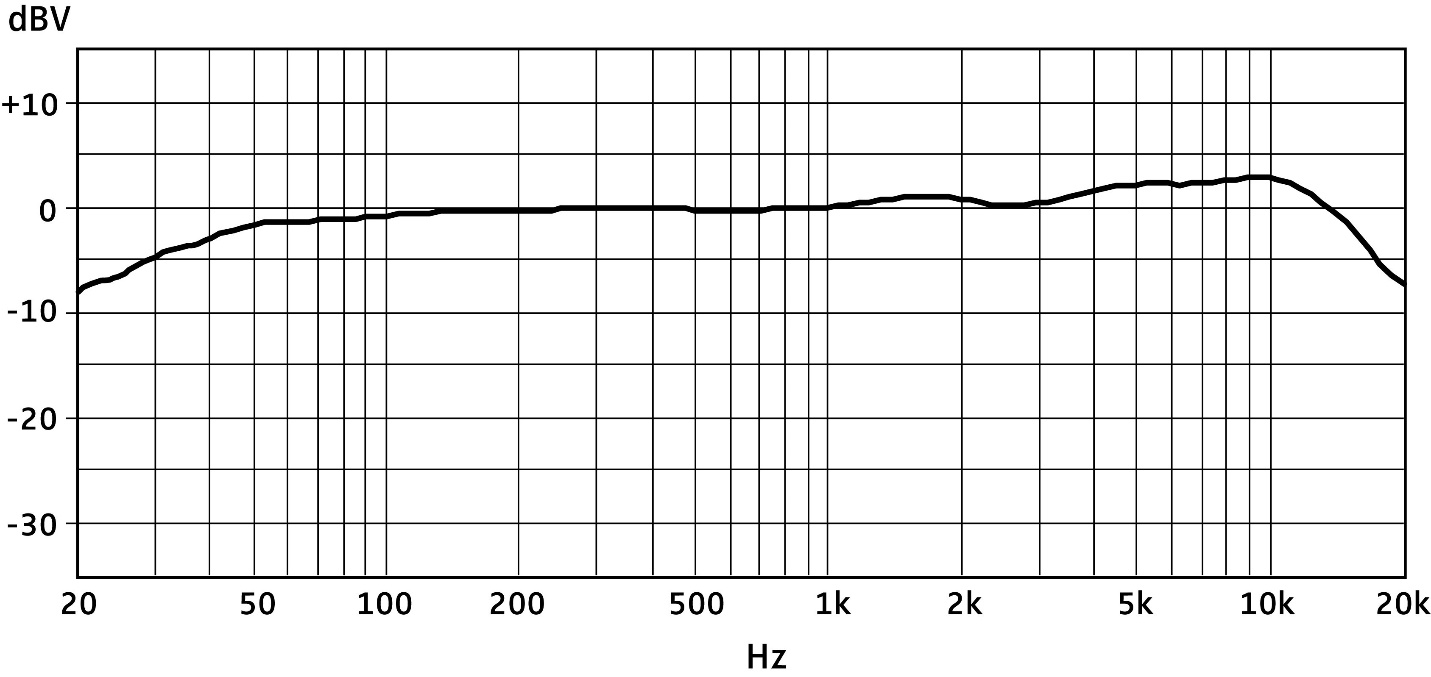 Well, I
think I have exceeded my allotment of words for this article. So, I guess we
will have to continue this at another time.
Until then,
happy recording. --------------------- ABOUT JAMES James Romick figures he's in the fourth or fifth phase of a 40+ year acting career, who "never in my wildest imagination did I ever think that I'd be recording and producing audiobooks at home in my den from a vocal booth I designed and built myself." In between acting jobs, James also studied audio engineering at the Institute of Audio Research in NYC at a time when editing analog tape in a "splicing block" with a razor blade was the norm. "Digital recording and editing is soooo much easier!" James has several DAWs (7 or 8 by last count) installed on his computer and has played around with them all. But he keeps coming back to REAPER as his go-to. James offers one-on-one consulting via Zoom and Skype on how to set up REAPER specifically for voice over and audiobook production. James also offers tutoring in voice over and audiobook recording. He has given PowerPoint presentations on basic home studio setup, REAPER and audiobooks at the SAG-AFTRA Foundation (EIF) Voiceover Lab in New York City.
Email: jamesromick@msn.com Web: www.romicksvoice.com |
|
|


.gif)

Get your bi-weekly dose here ... all things VO!
For essential voice-over business strategies
Email alerts to new VoiceOverXtra articles
On Michael Langsner's Voice-Over Roadmap Podcast
As of the NEW website launch, 03/22/2012
russdewolfevo.com
Thanks again and stay safe !
Regards,
Mark